When deploying infrastructures with Terraform, there is a vital part of the process that has to do with Providers. Providers are plugins that allow you to interact with different Cloud Provider Services/Resources.
When you use a cloud provider's Management Console, like AWS, you input some credentials that grant you access to the resources available there. In the same way, when you use terraform, you need to input some credentials to deploy resources on them.
In this article, we will be delving into how we can securely configure and authenticate a user to carry out tasks with terraform.
Prerequisites
To effectively follow along with what I'll be doing here, these are the things you should have set up.
An AWS account either with the root login access or an admin IAM user access.
An Ubuntu 20.04 Virtual Machine (VM) with Terraform installed on it. You can click here to see how to install it on your machine.
For us to have an easy flow for this task, we will be grouping the task into two parts. The first will be carried out on the AWS Management Console while the other part will be on our VM.
Creation of IAM User and Access Keys on AWS Console
Log into the AWS console with your credentials. These credentials include your
Account ID or alias,IAM user name, andPasswordas shown below: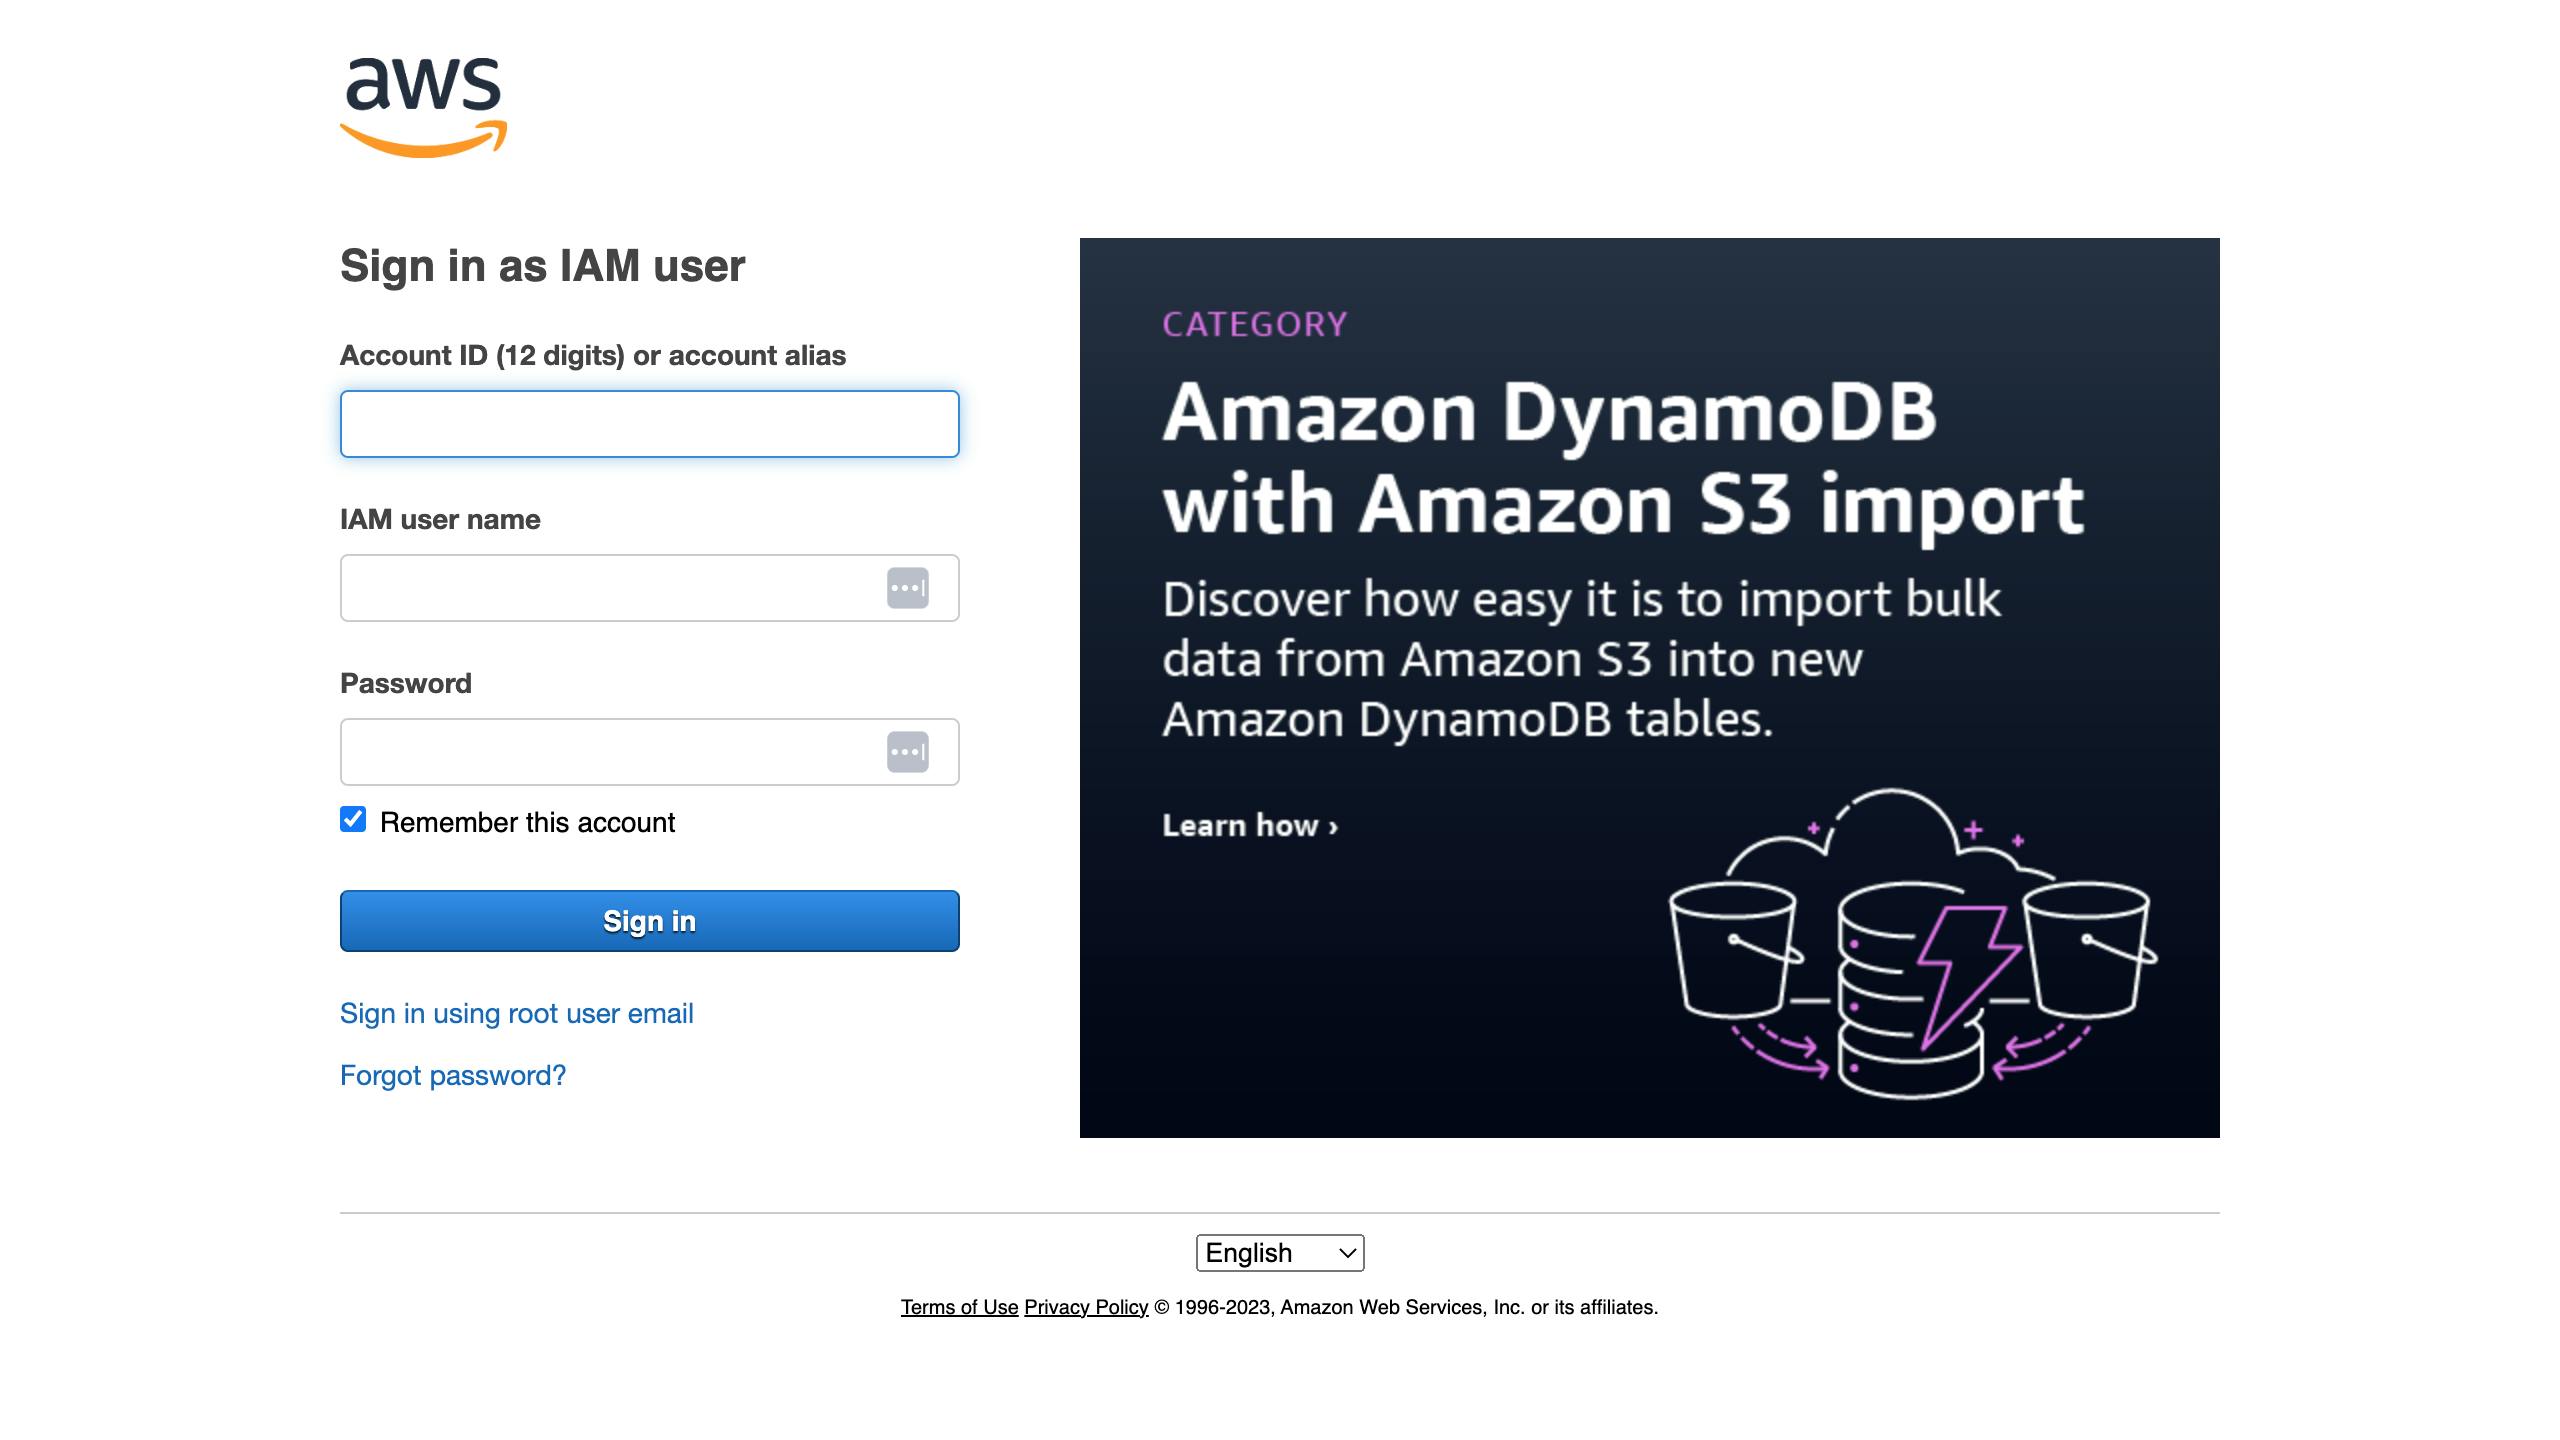
From the home page, navigate to the IAM service by typing into the search bar. You can also click on the link to the
IAMservice shown on this Home page.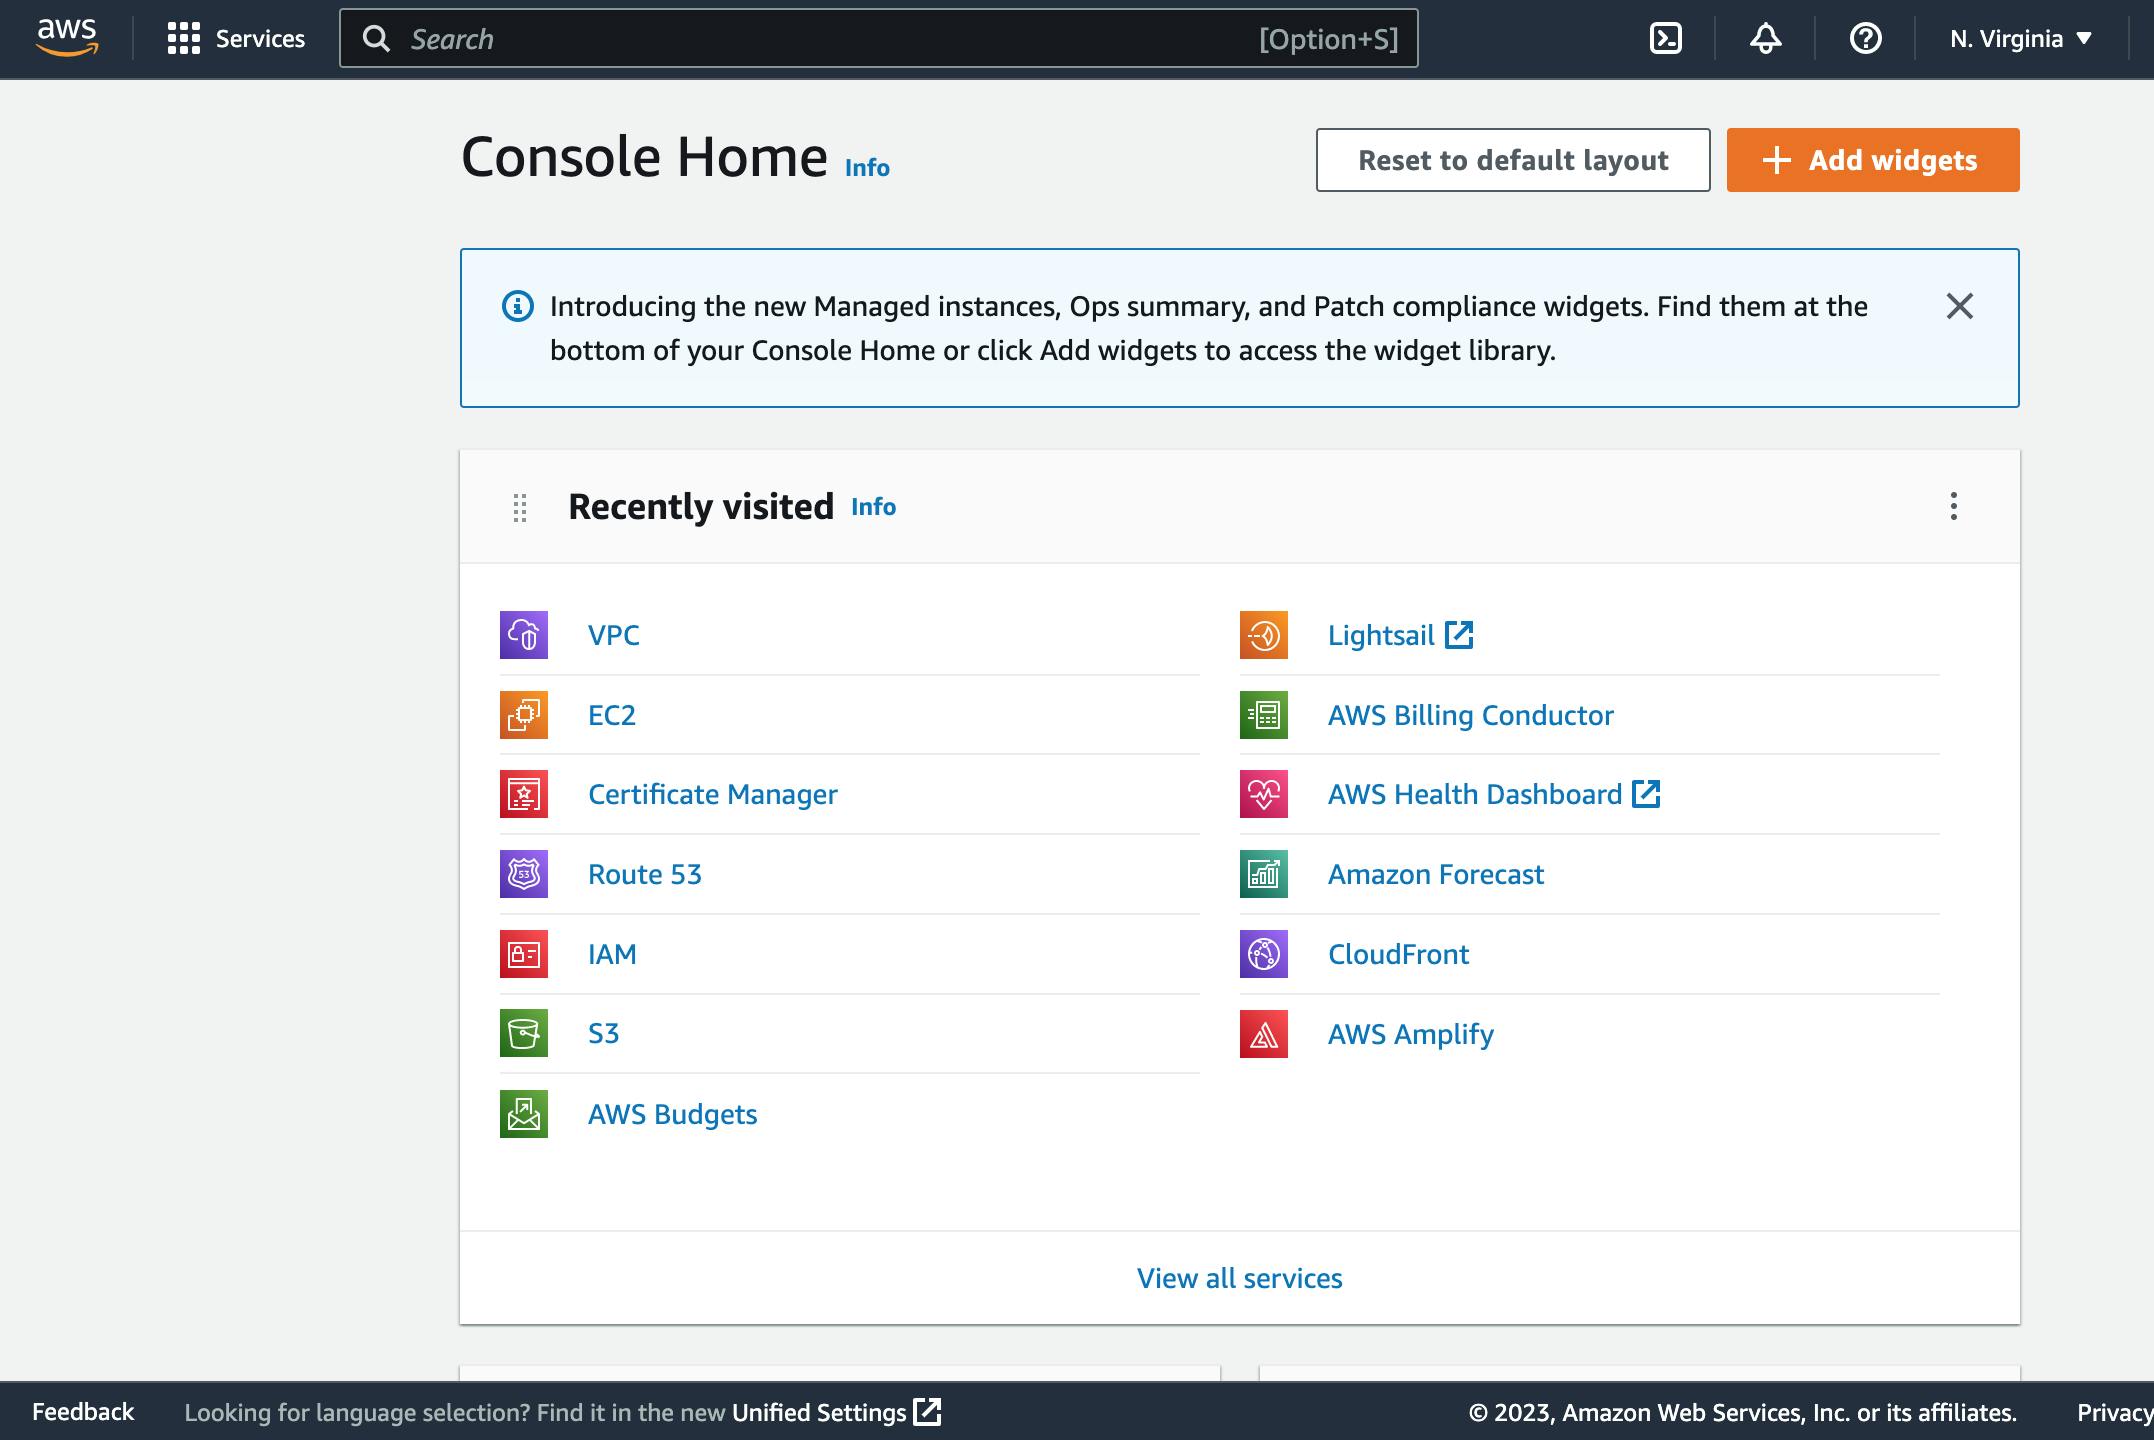
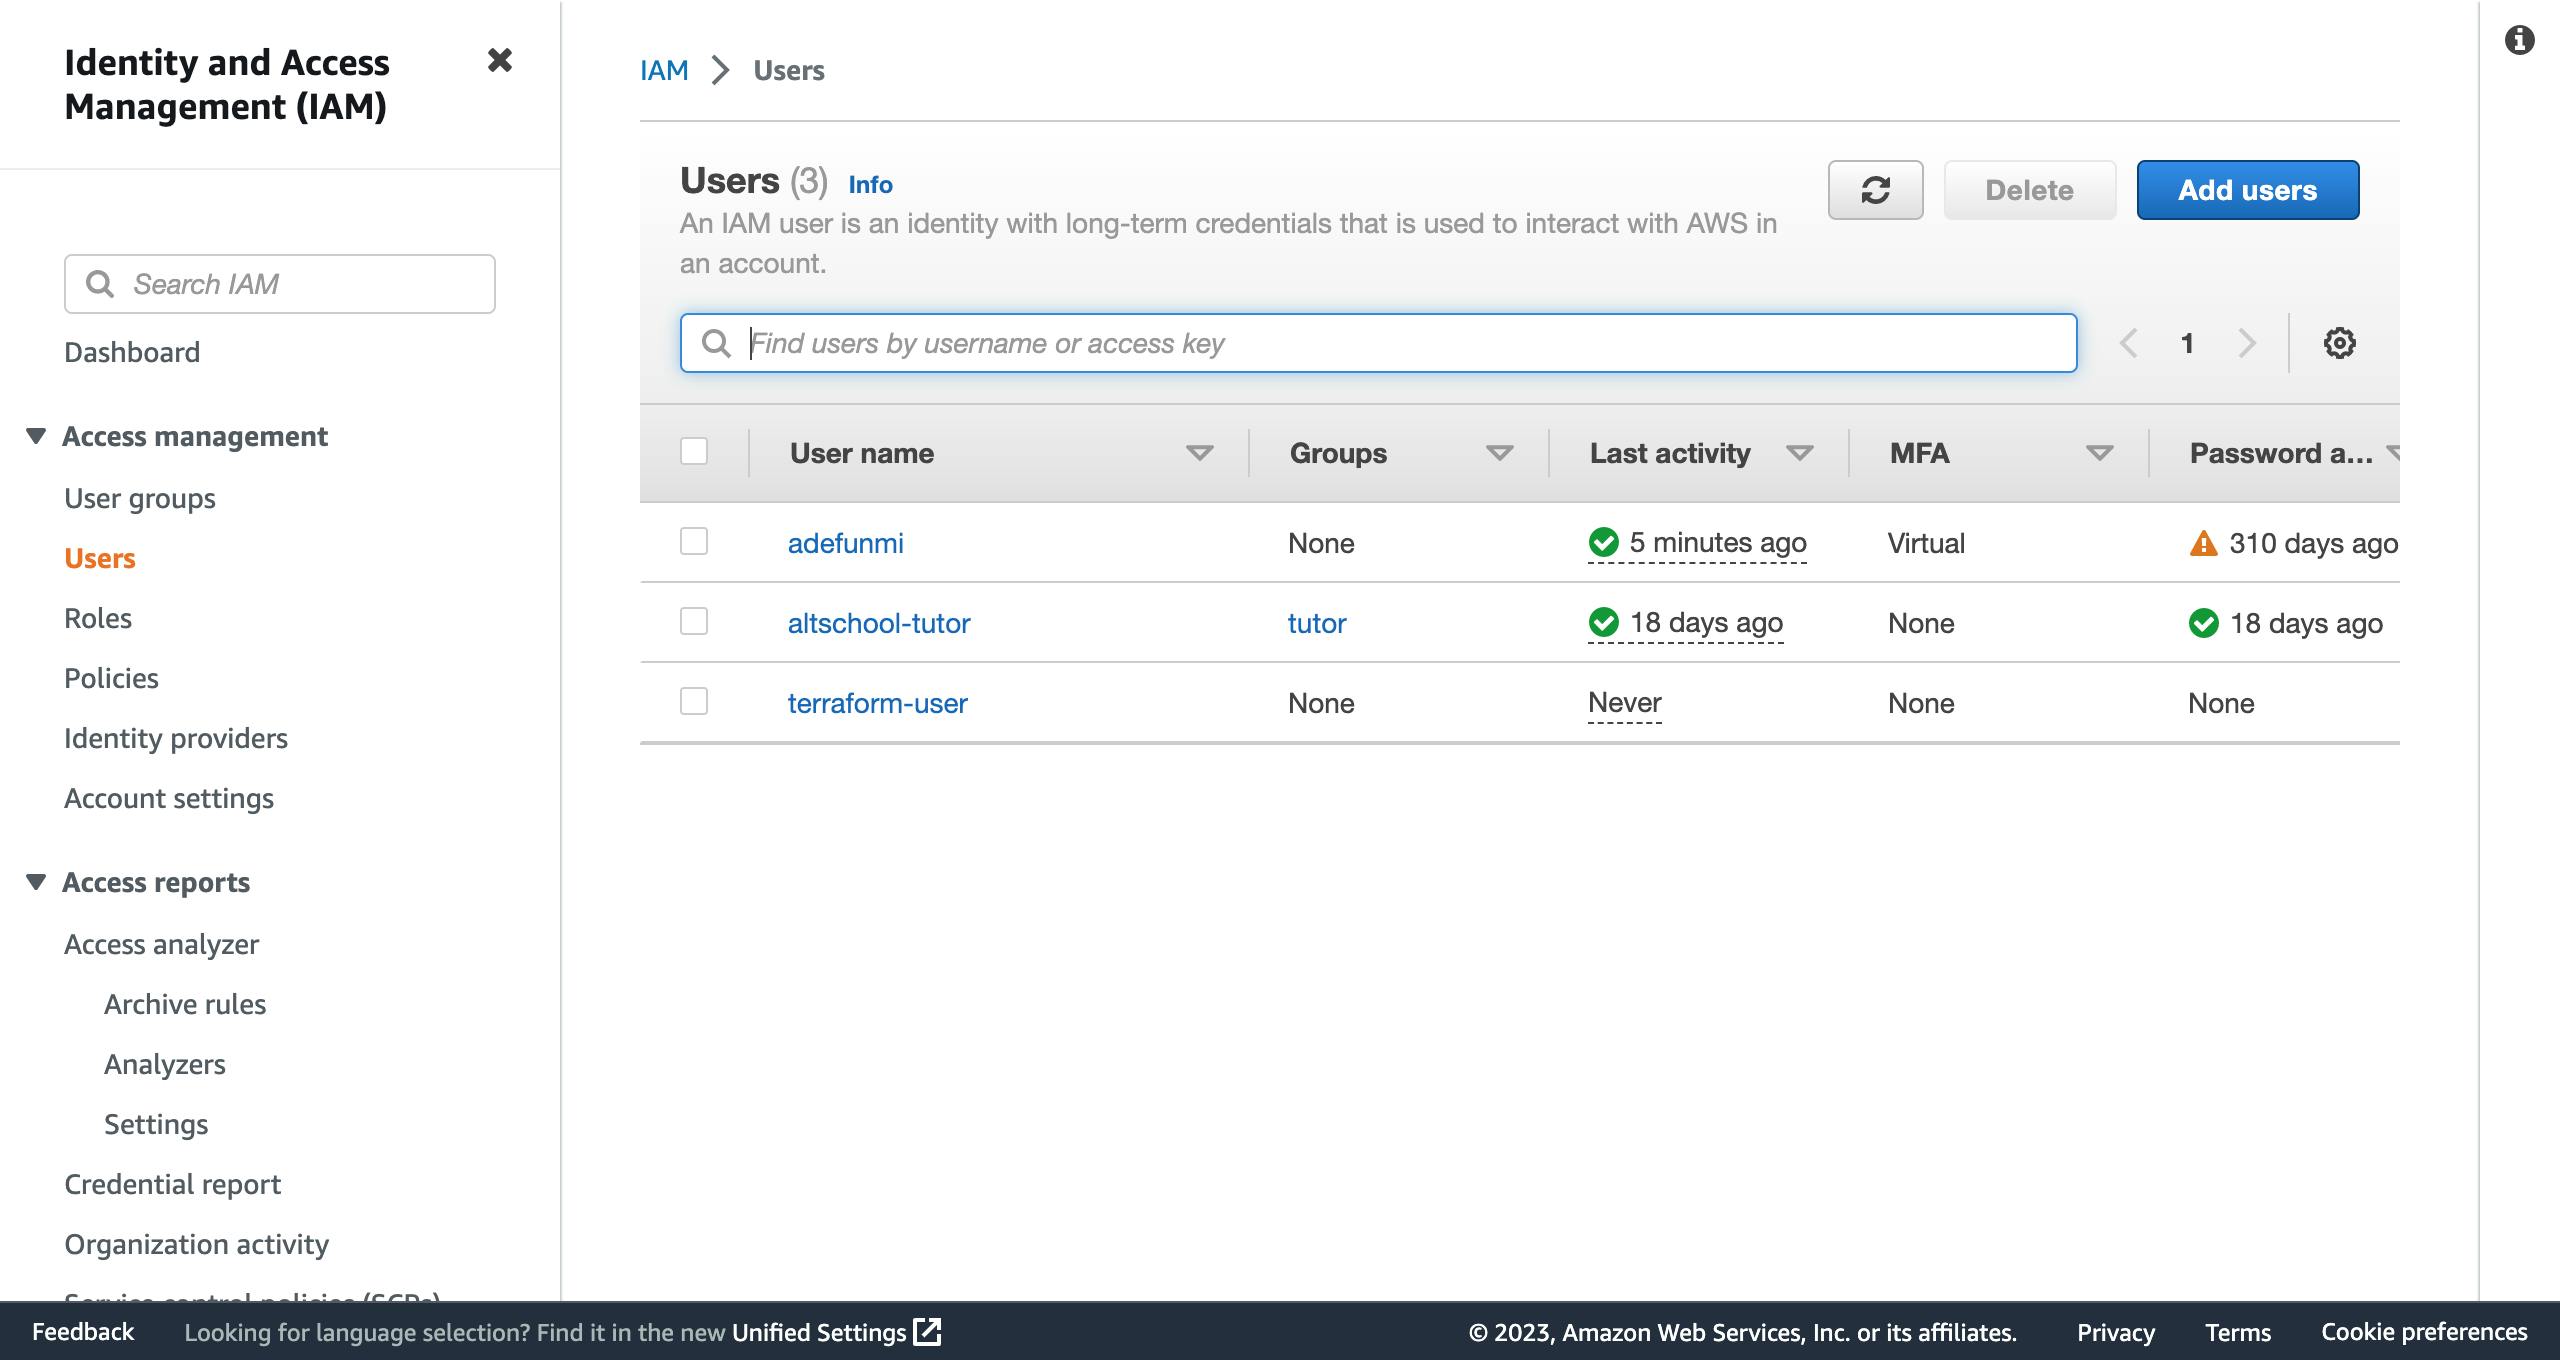
On the left pane of the new page, click on
users, thenAdd users. Note that in the image below, I already have some users created. if you are using yours for the first time, it will be empty.
- On the next page, you will input a descriptive name that you will like to give to the user you want to create. However, for this user, we will not be enabling access to the console. This means that you will leave the small box unchecked. Click on the
nextbutton.
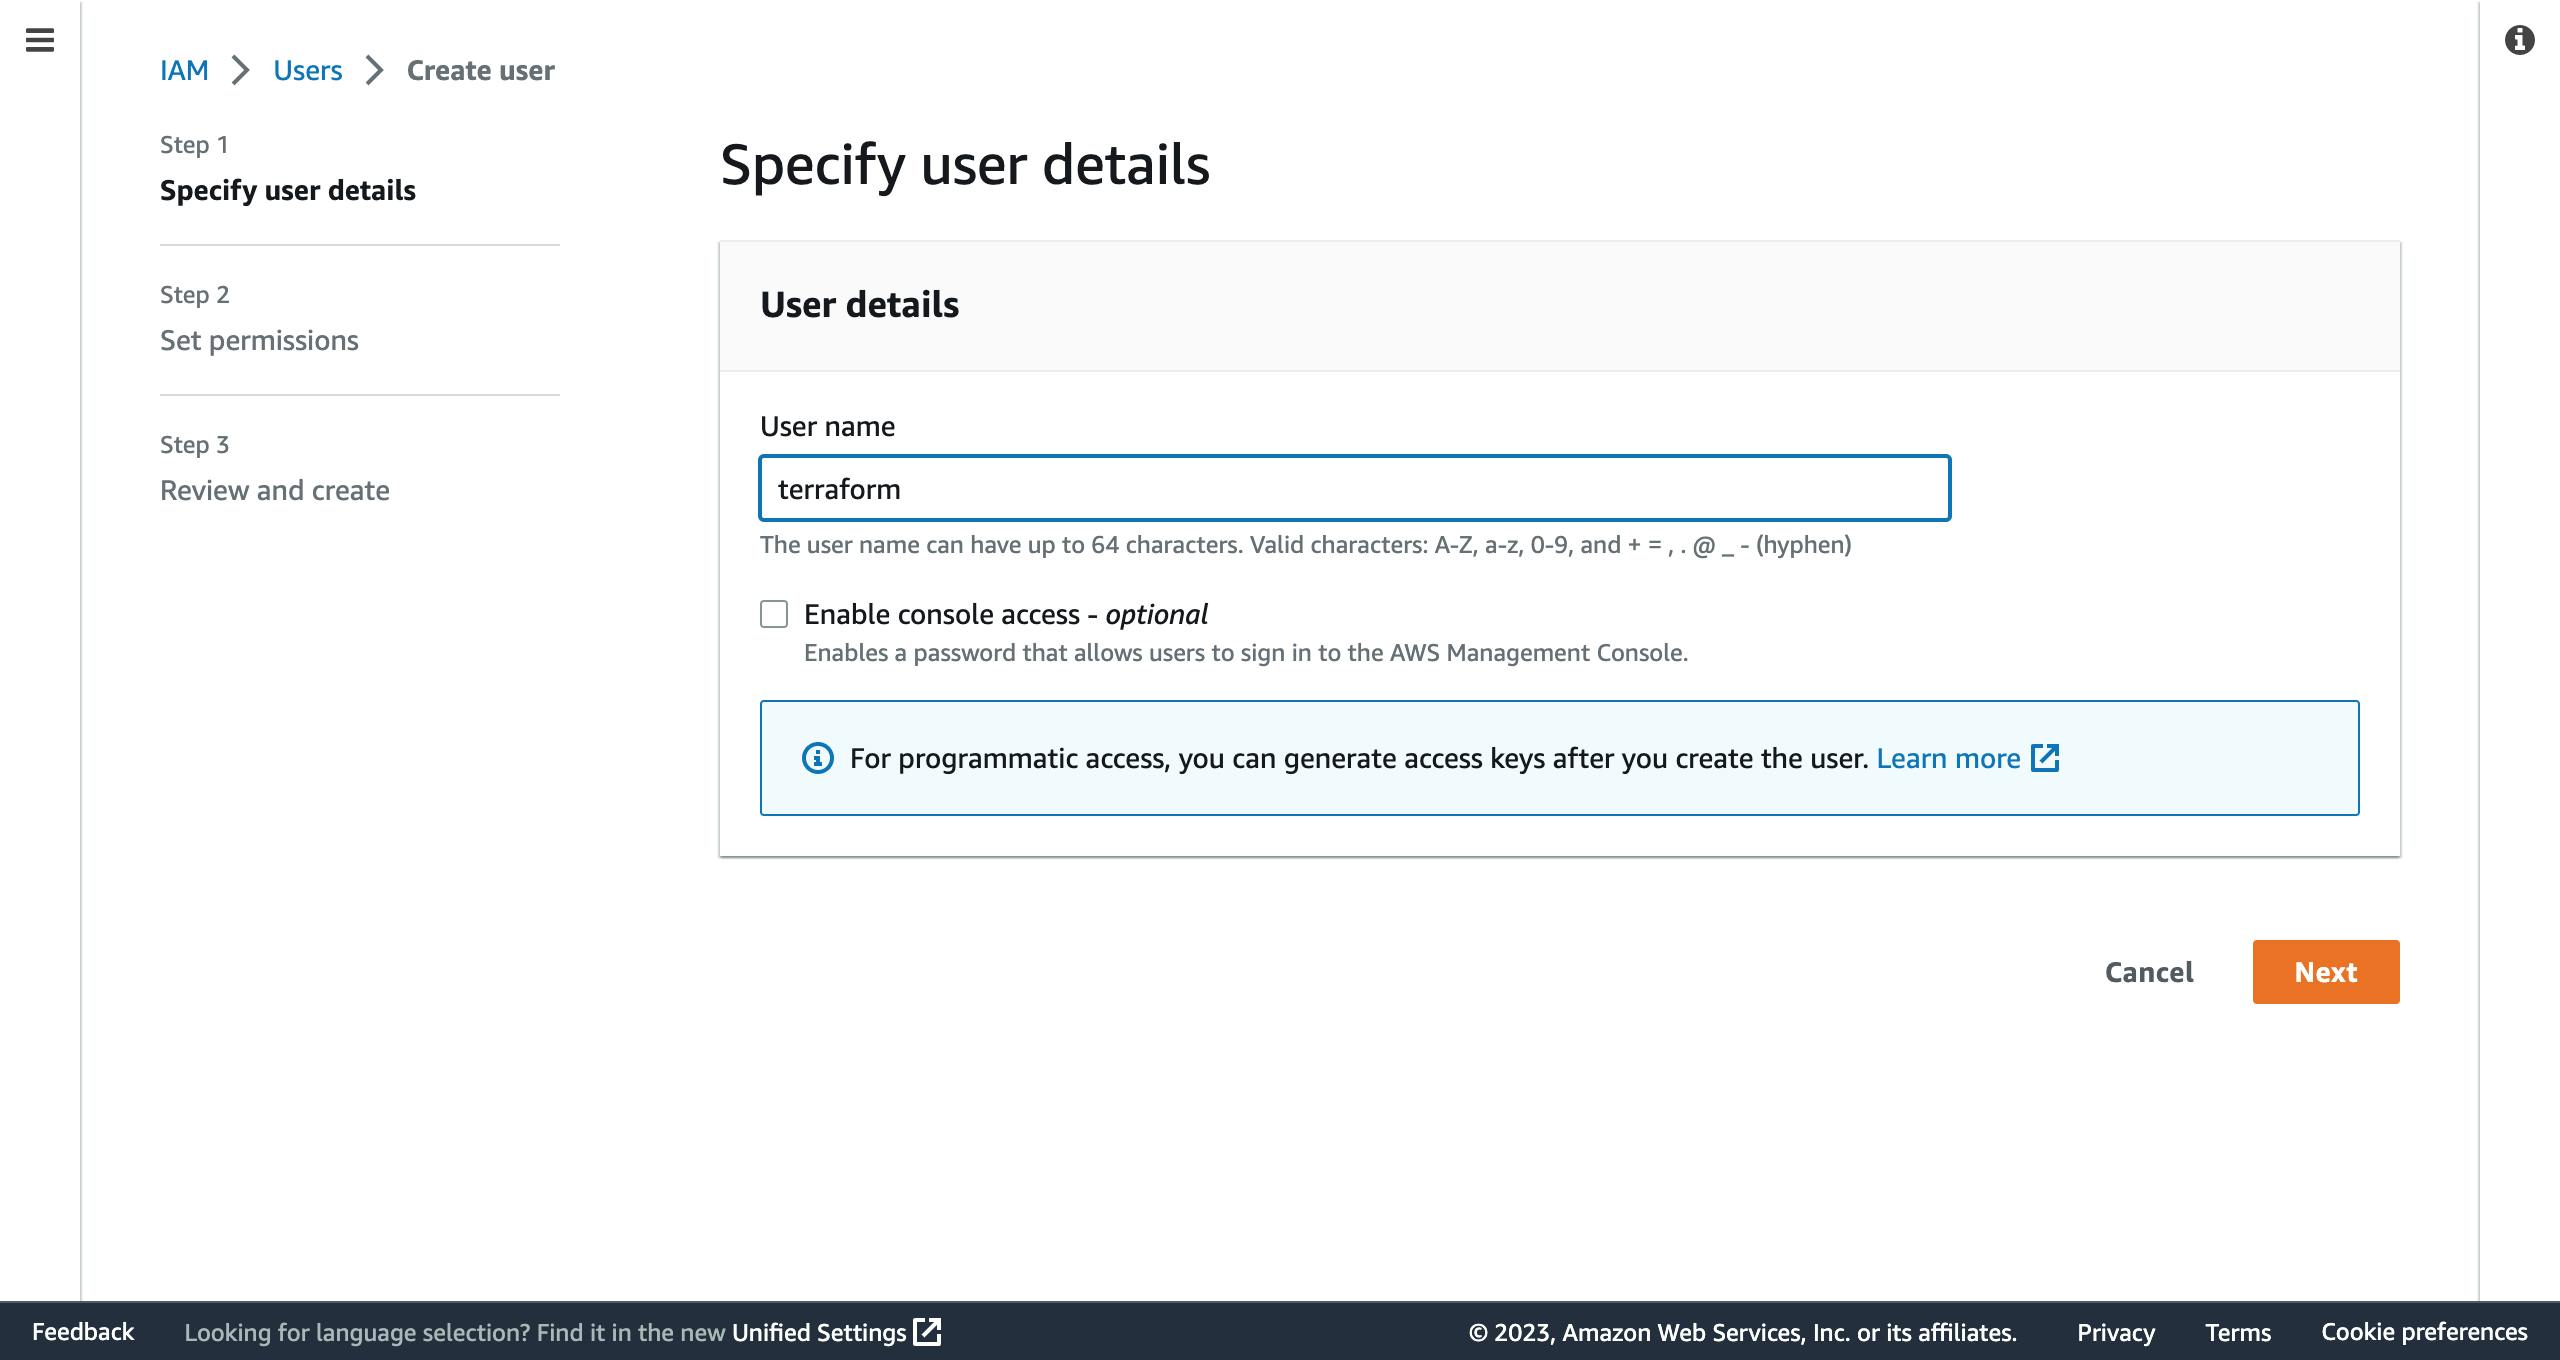
Note that part that says you can generate access keys after creating the user.
- On the next page which is for permissions, you would click on the
Attach policies directlytab.

Thereafter, check the AdministratorAccess box in the Permissions Policies section. Then scroll down the page and hit the Next button.
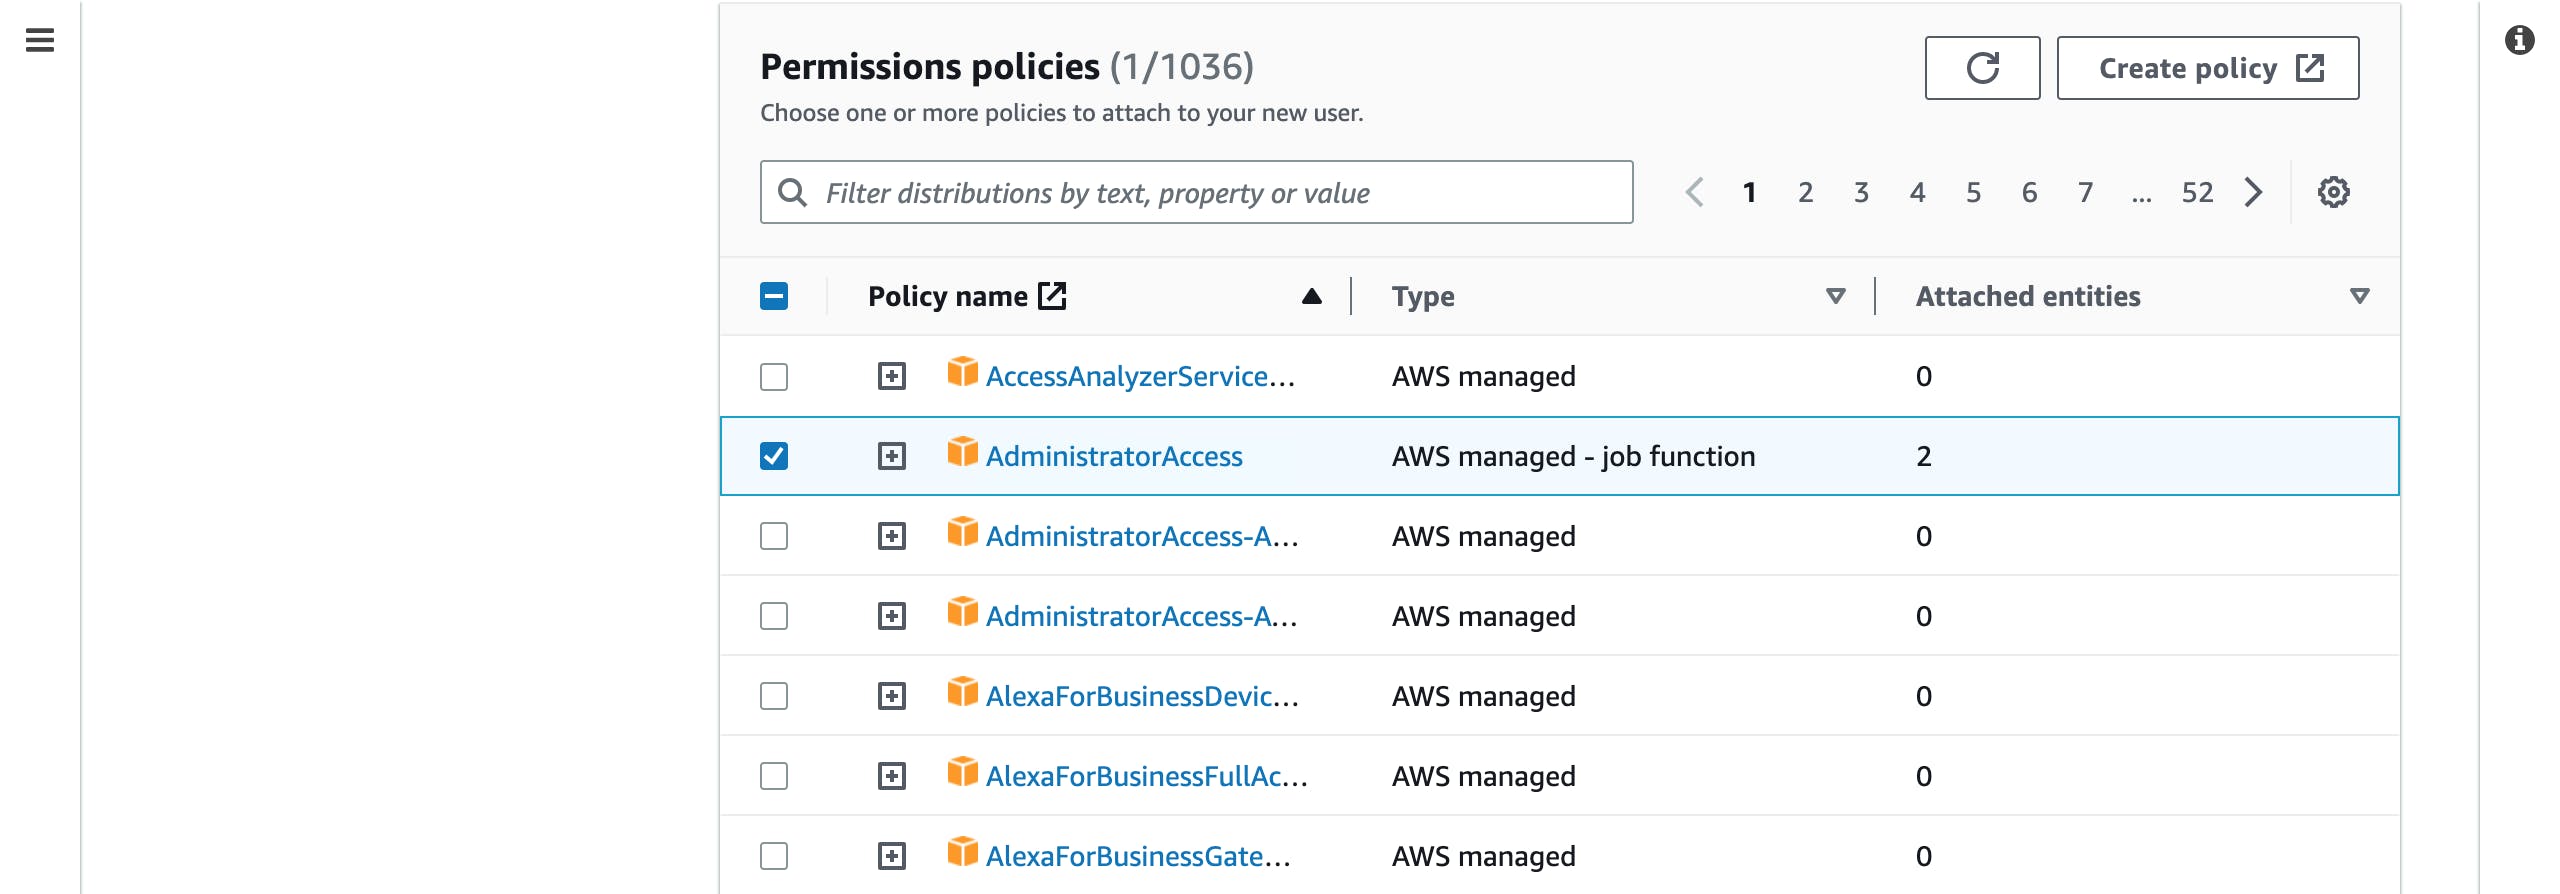
On the next page, you are required to review the information you provided and then hit the Create User button to create the user.
- On the users' page, you will see your newly created user, click on it. On the next page, scroll down and click on the
Security credentialstab.
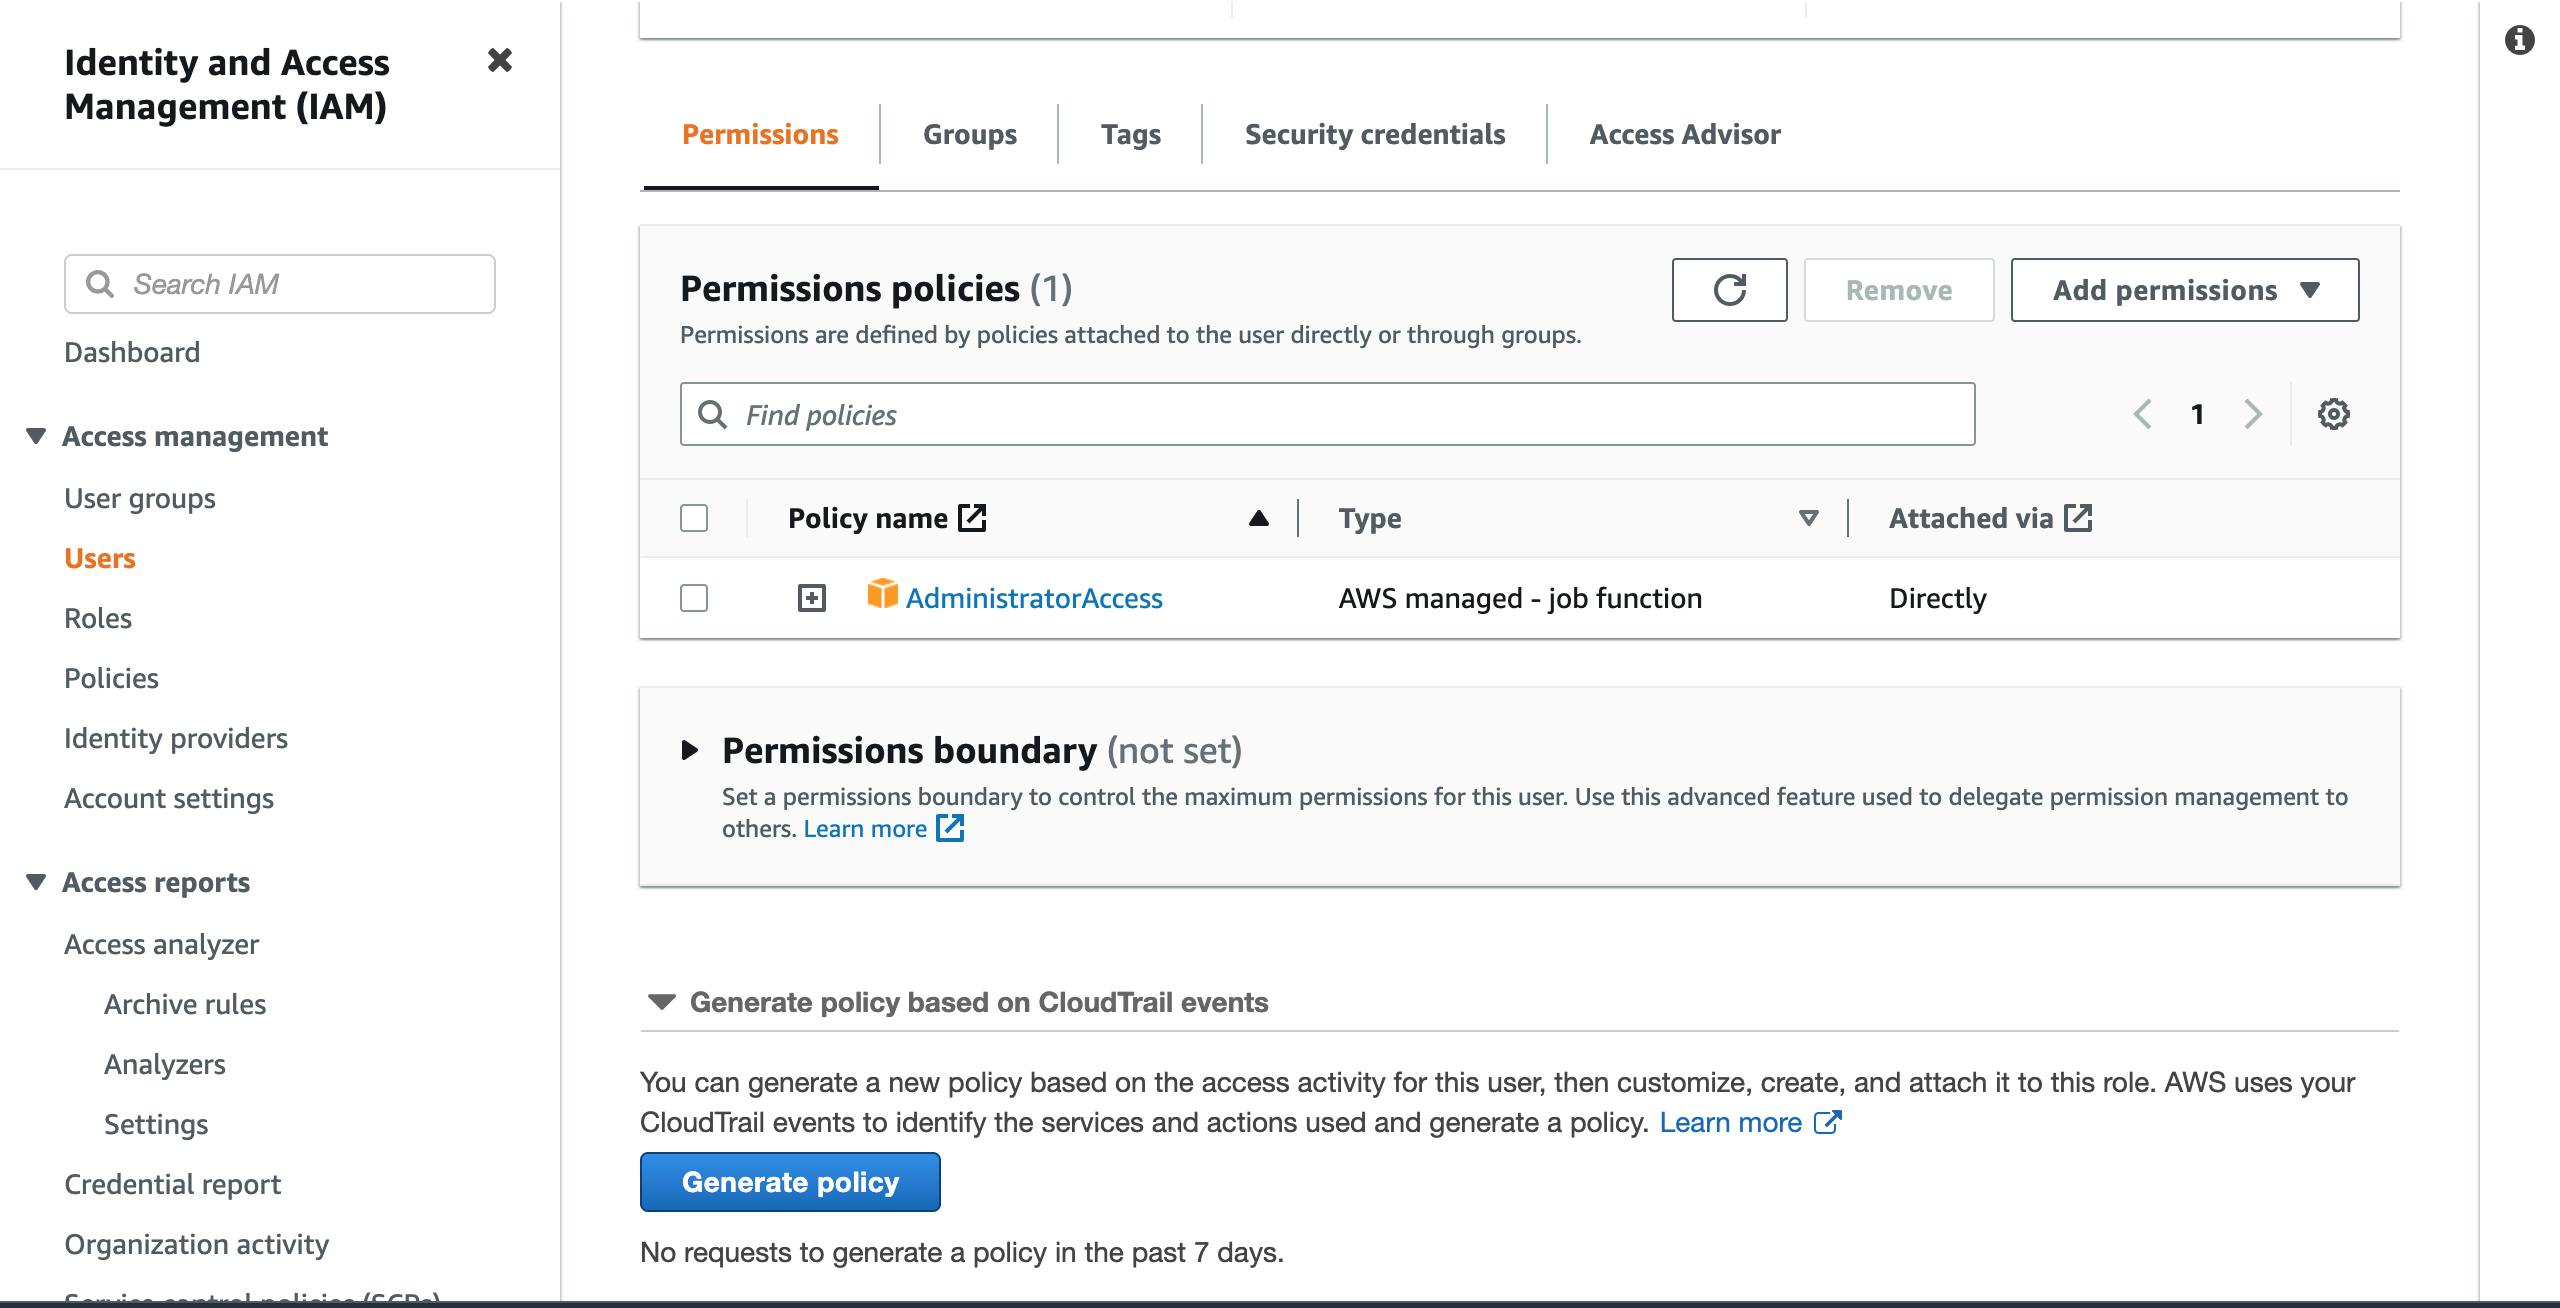
- On the
Security credentialspage, scroll down toAccess Keysand click onCreate access key.
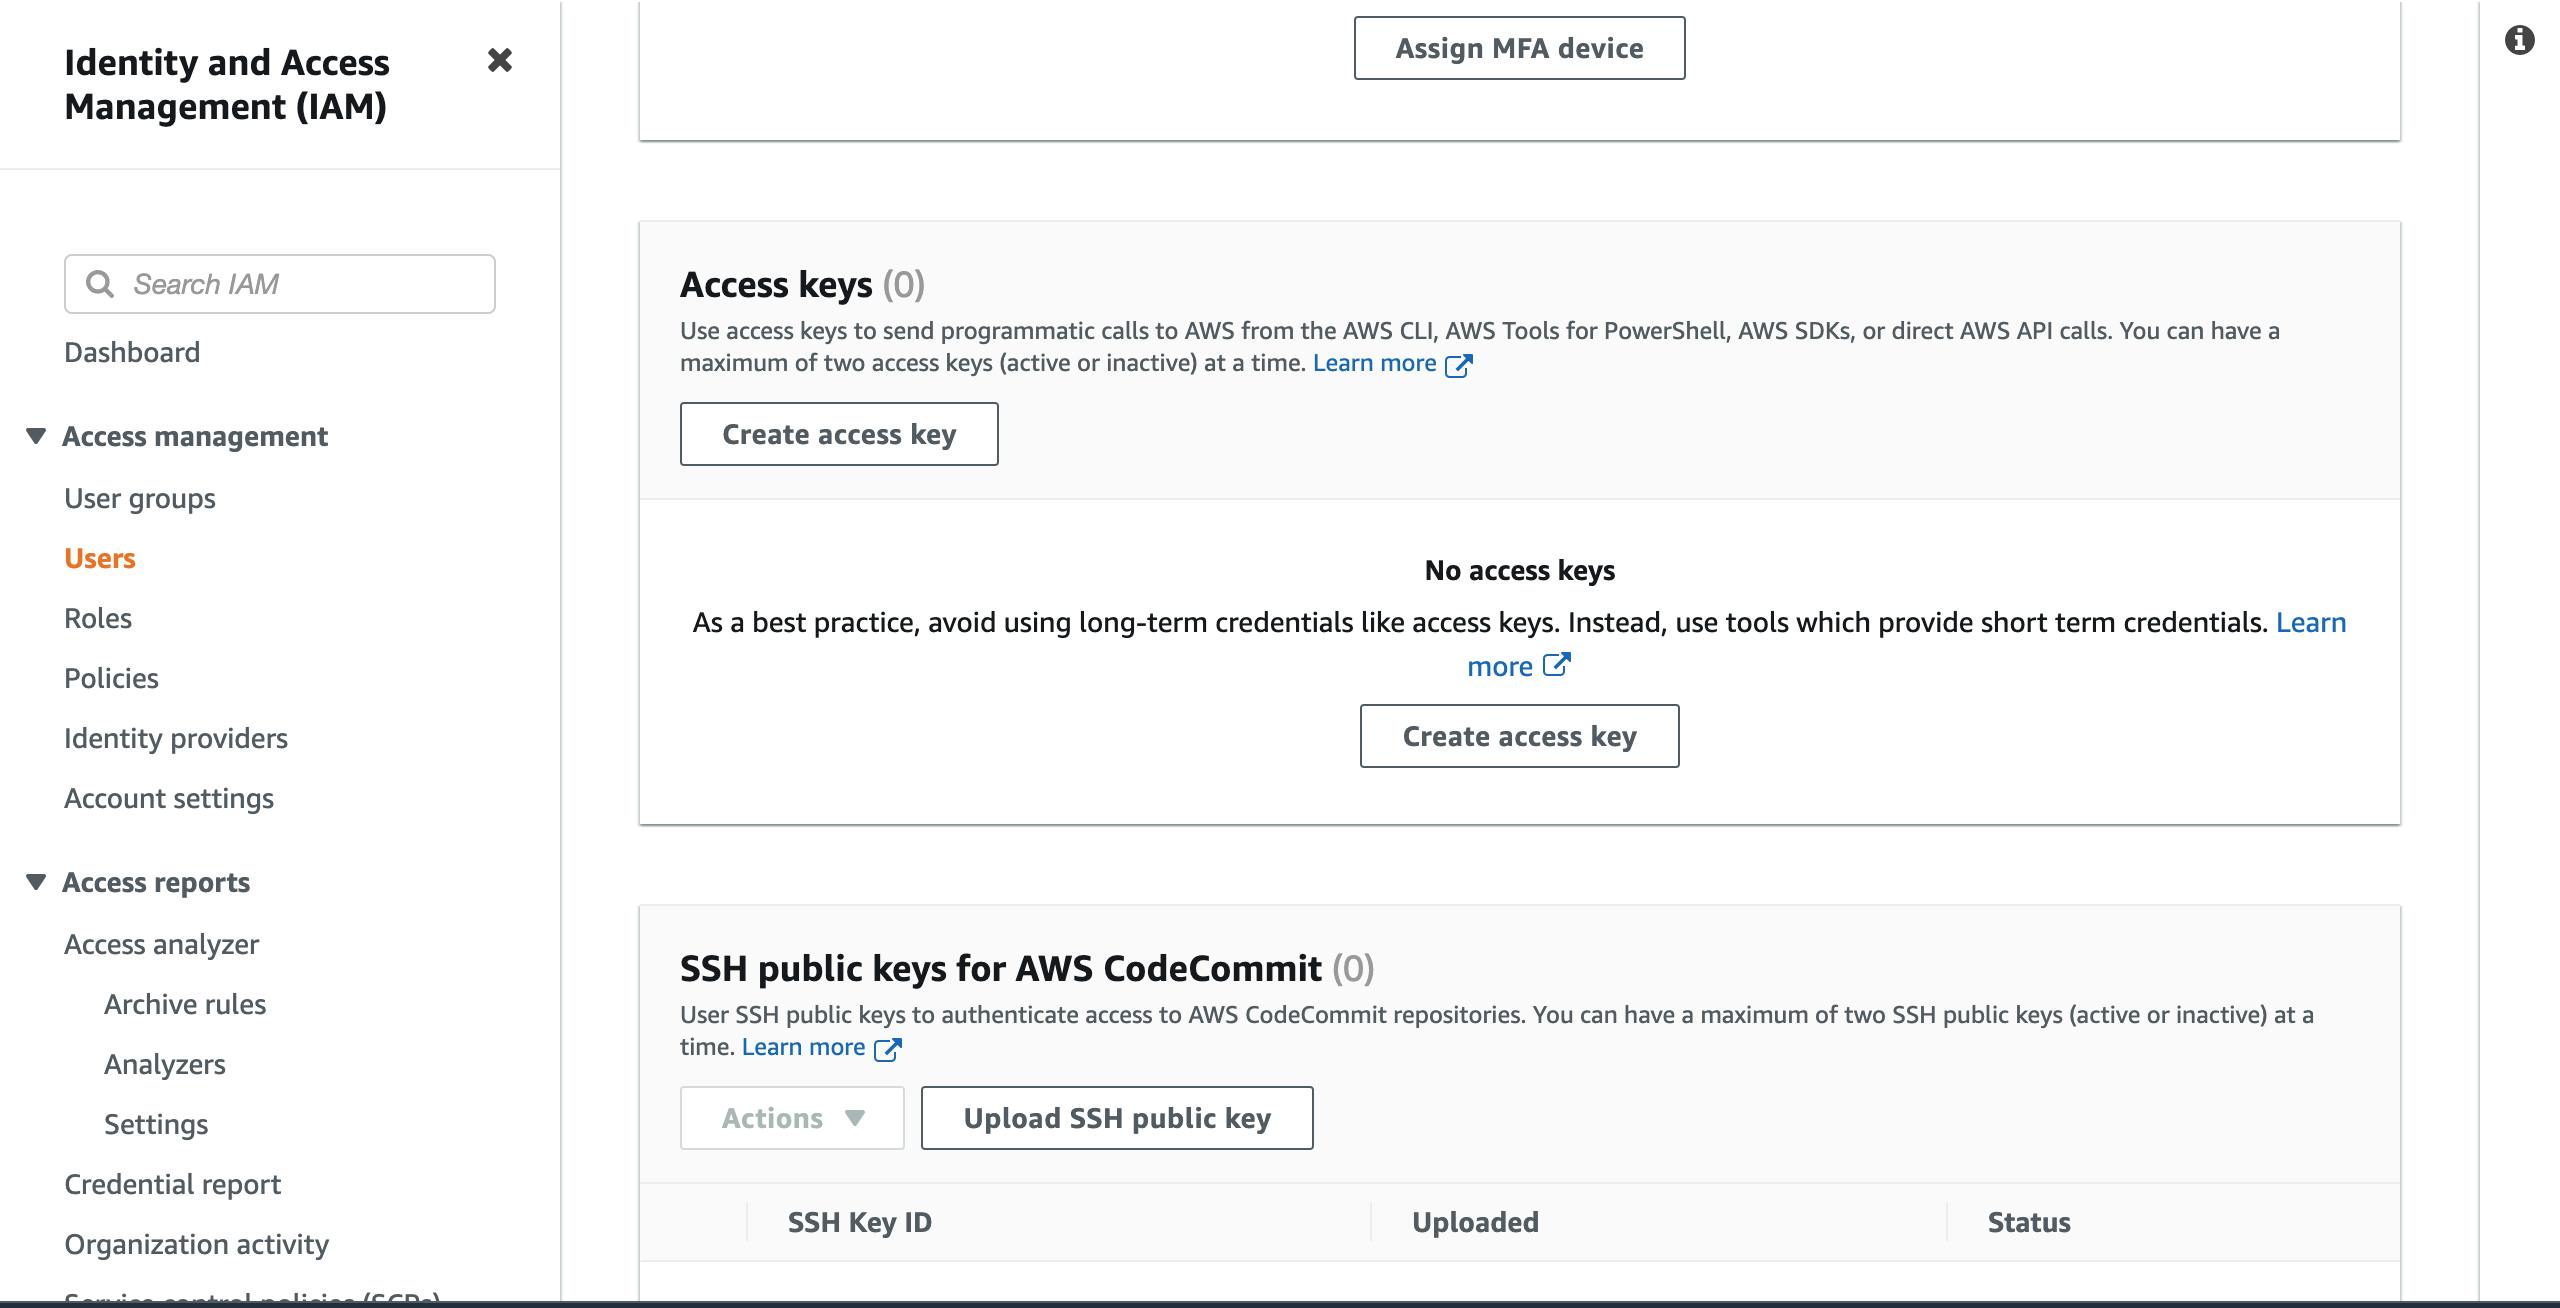
- On the next page, click on
Local codeand scroll down the page.
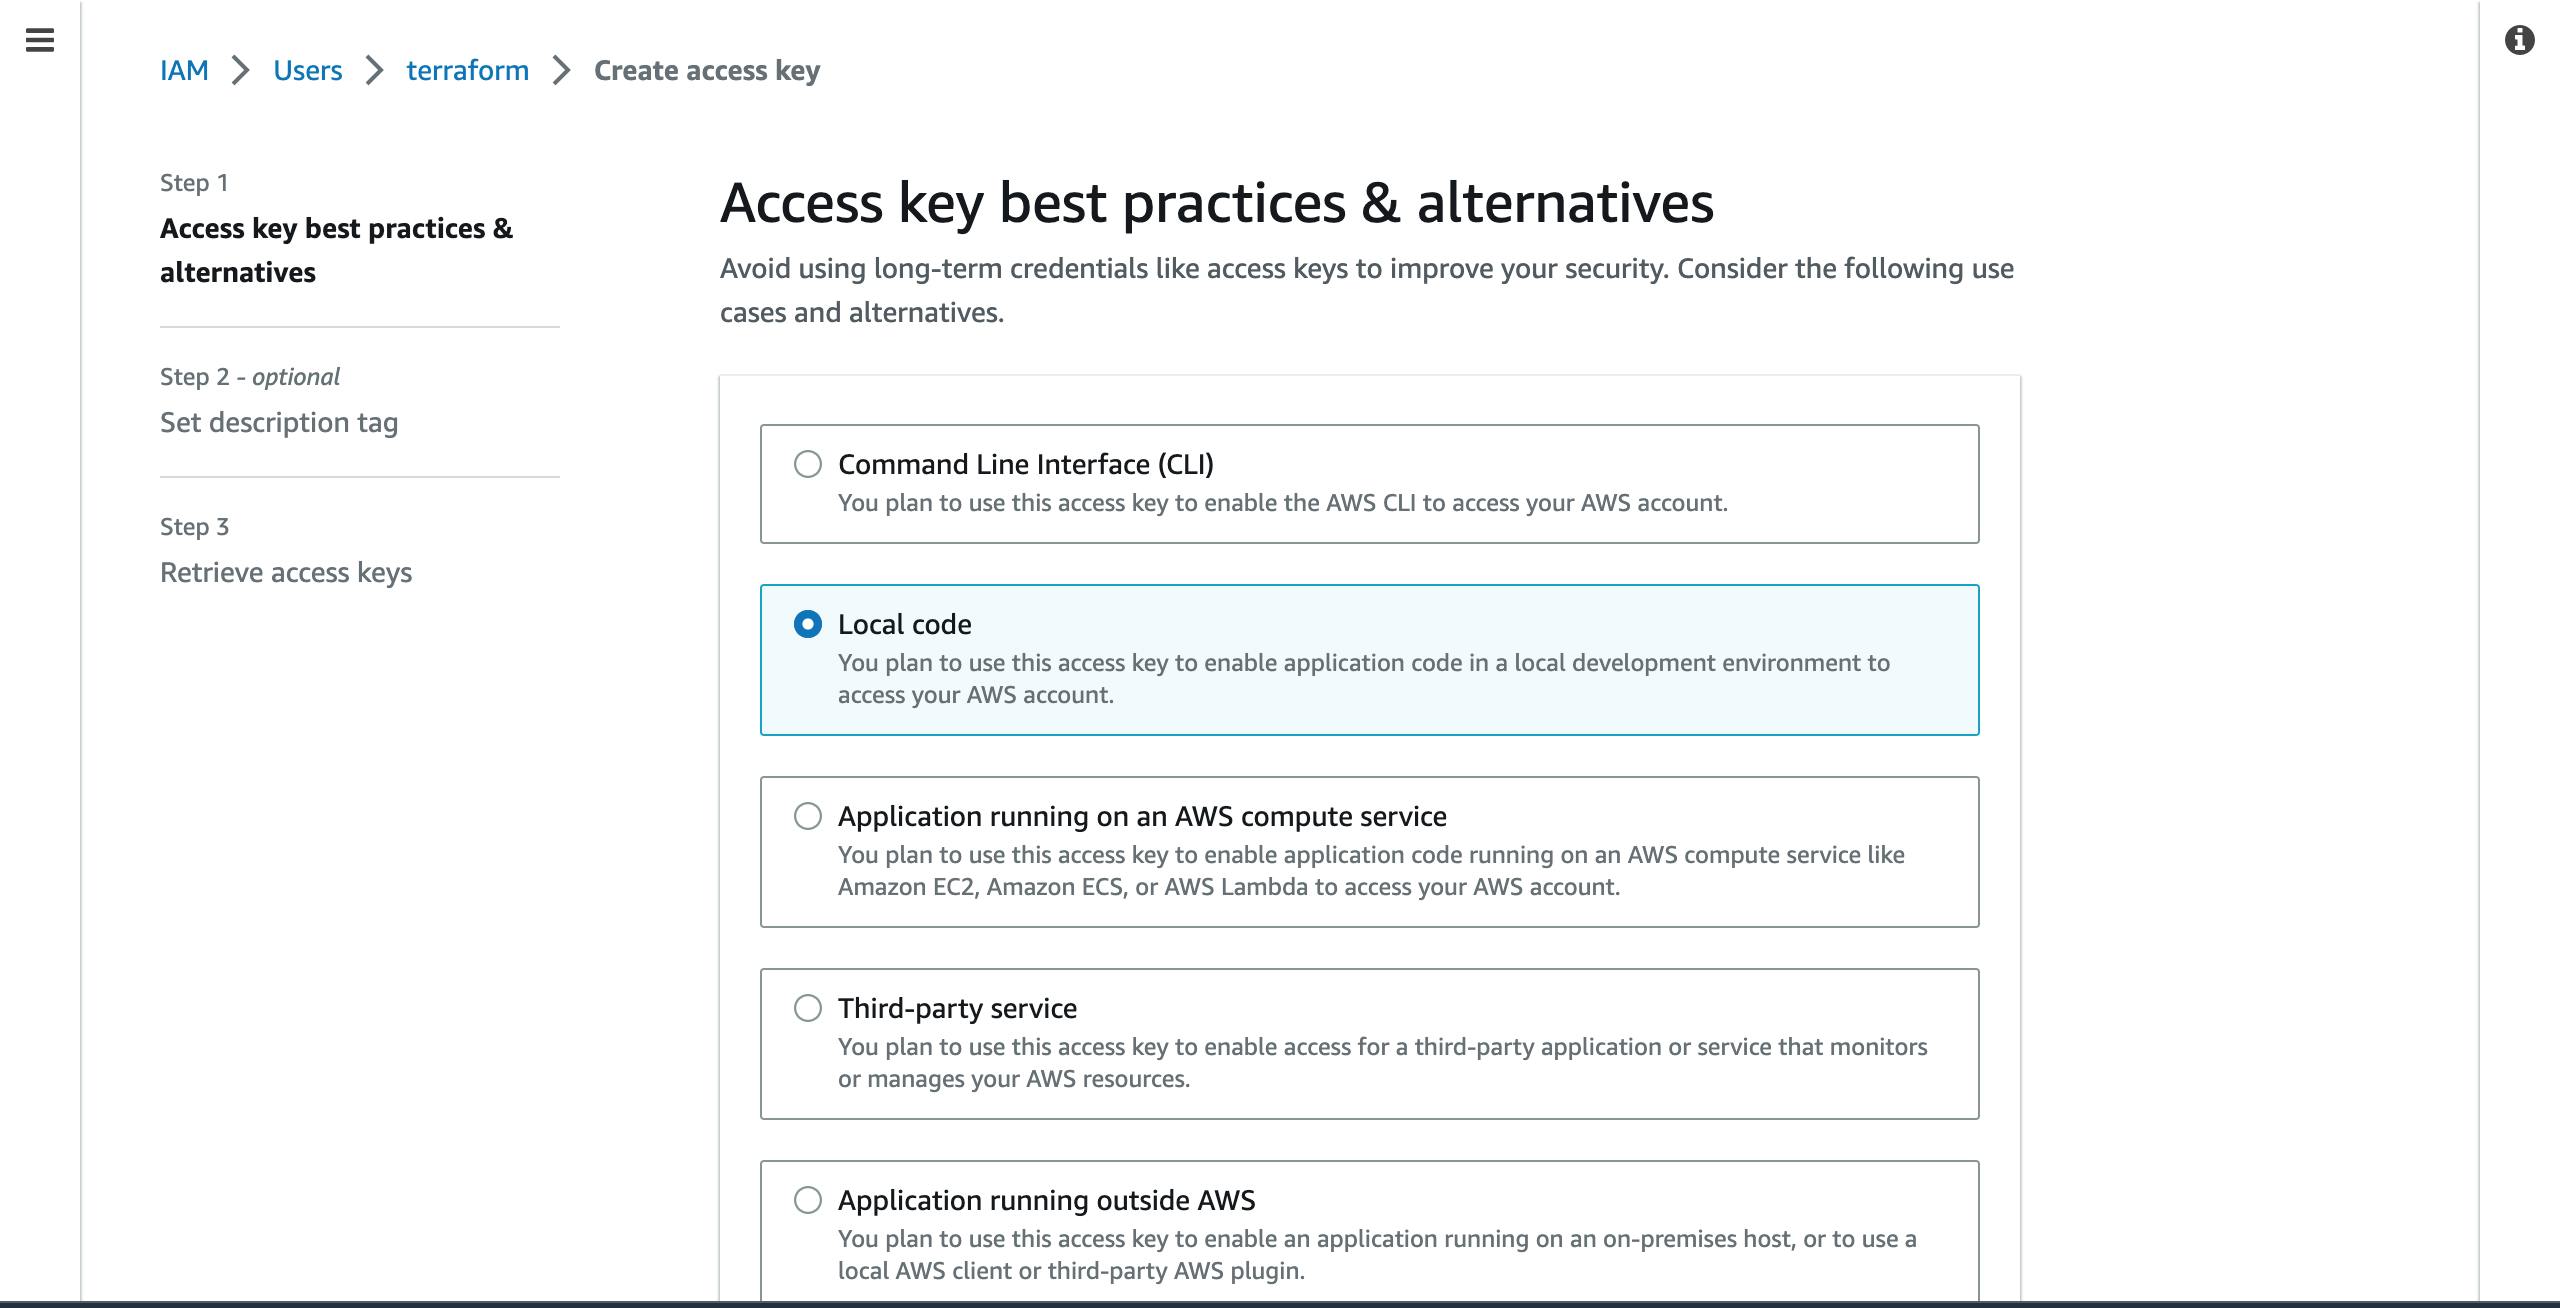
- Check the agreement box as shown below and click on the
Nextbutton down the page.

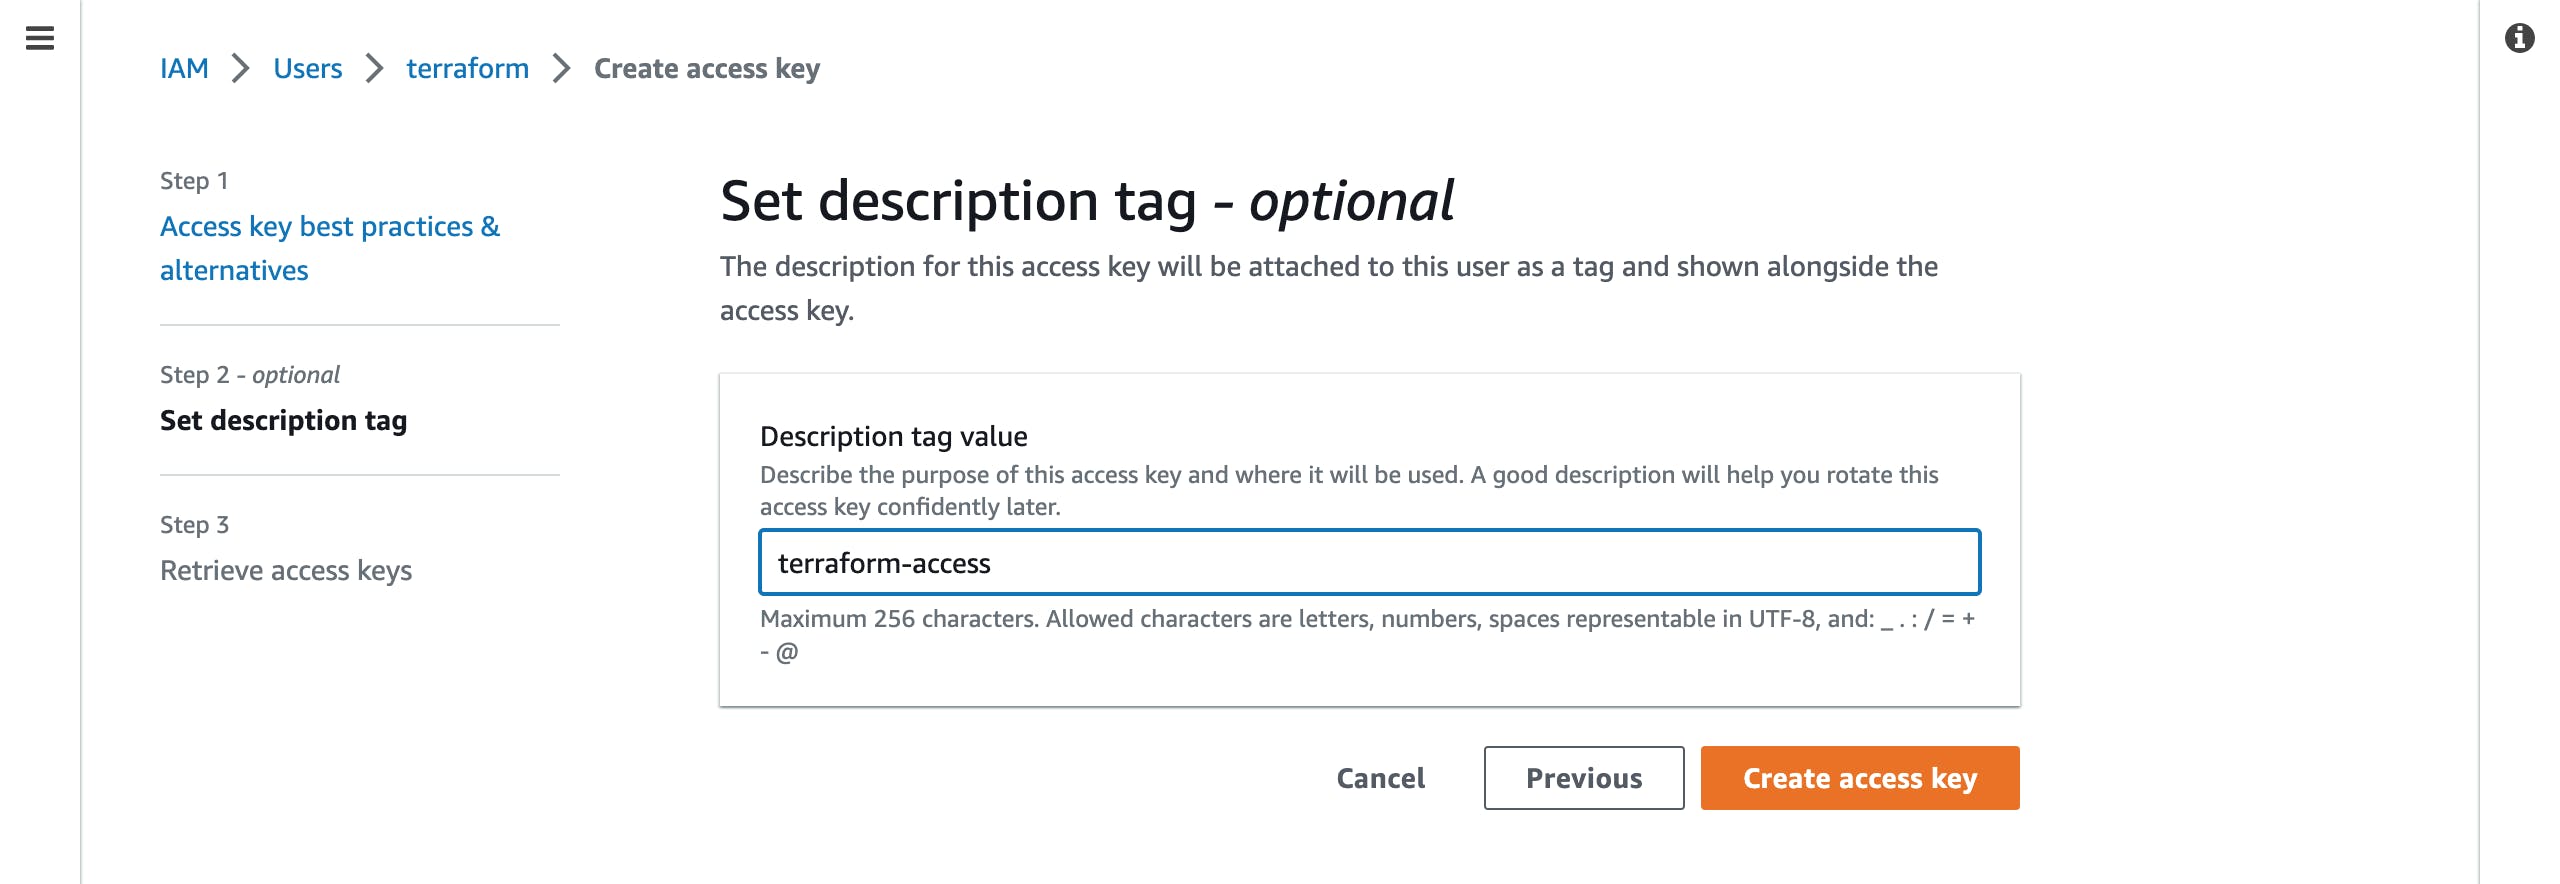
- On the new page, provide a descriptive name for the access key and click on the
Create access keytab.
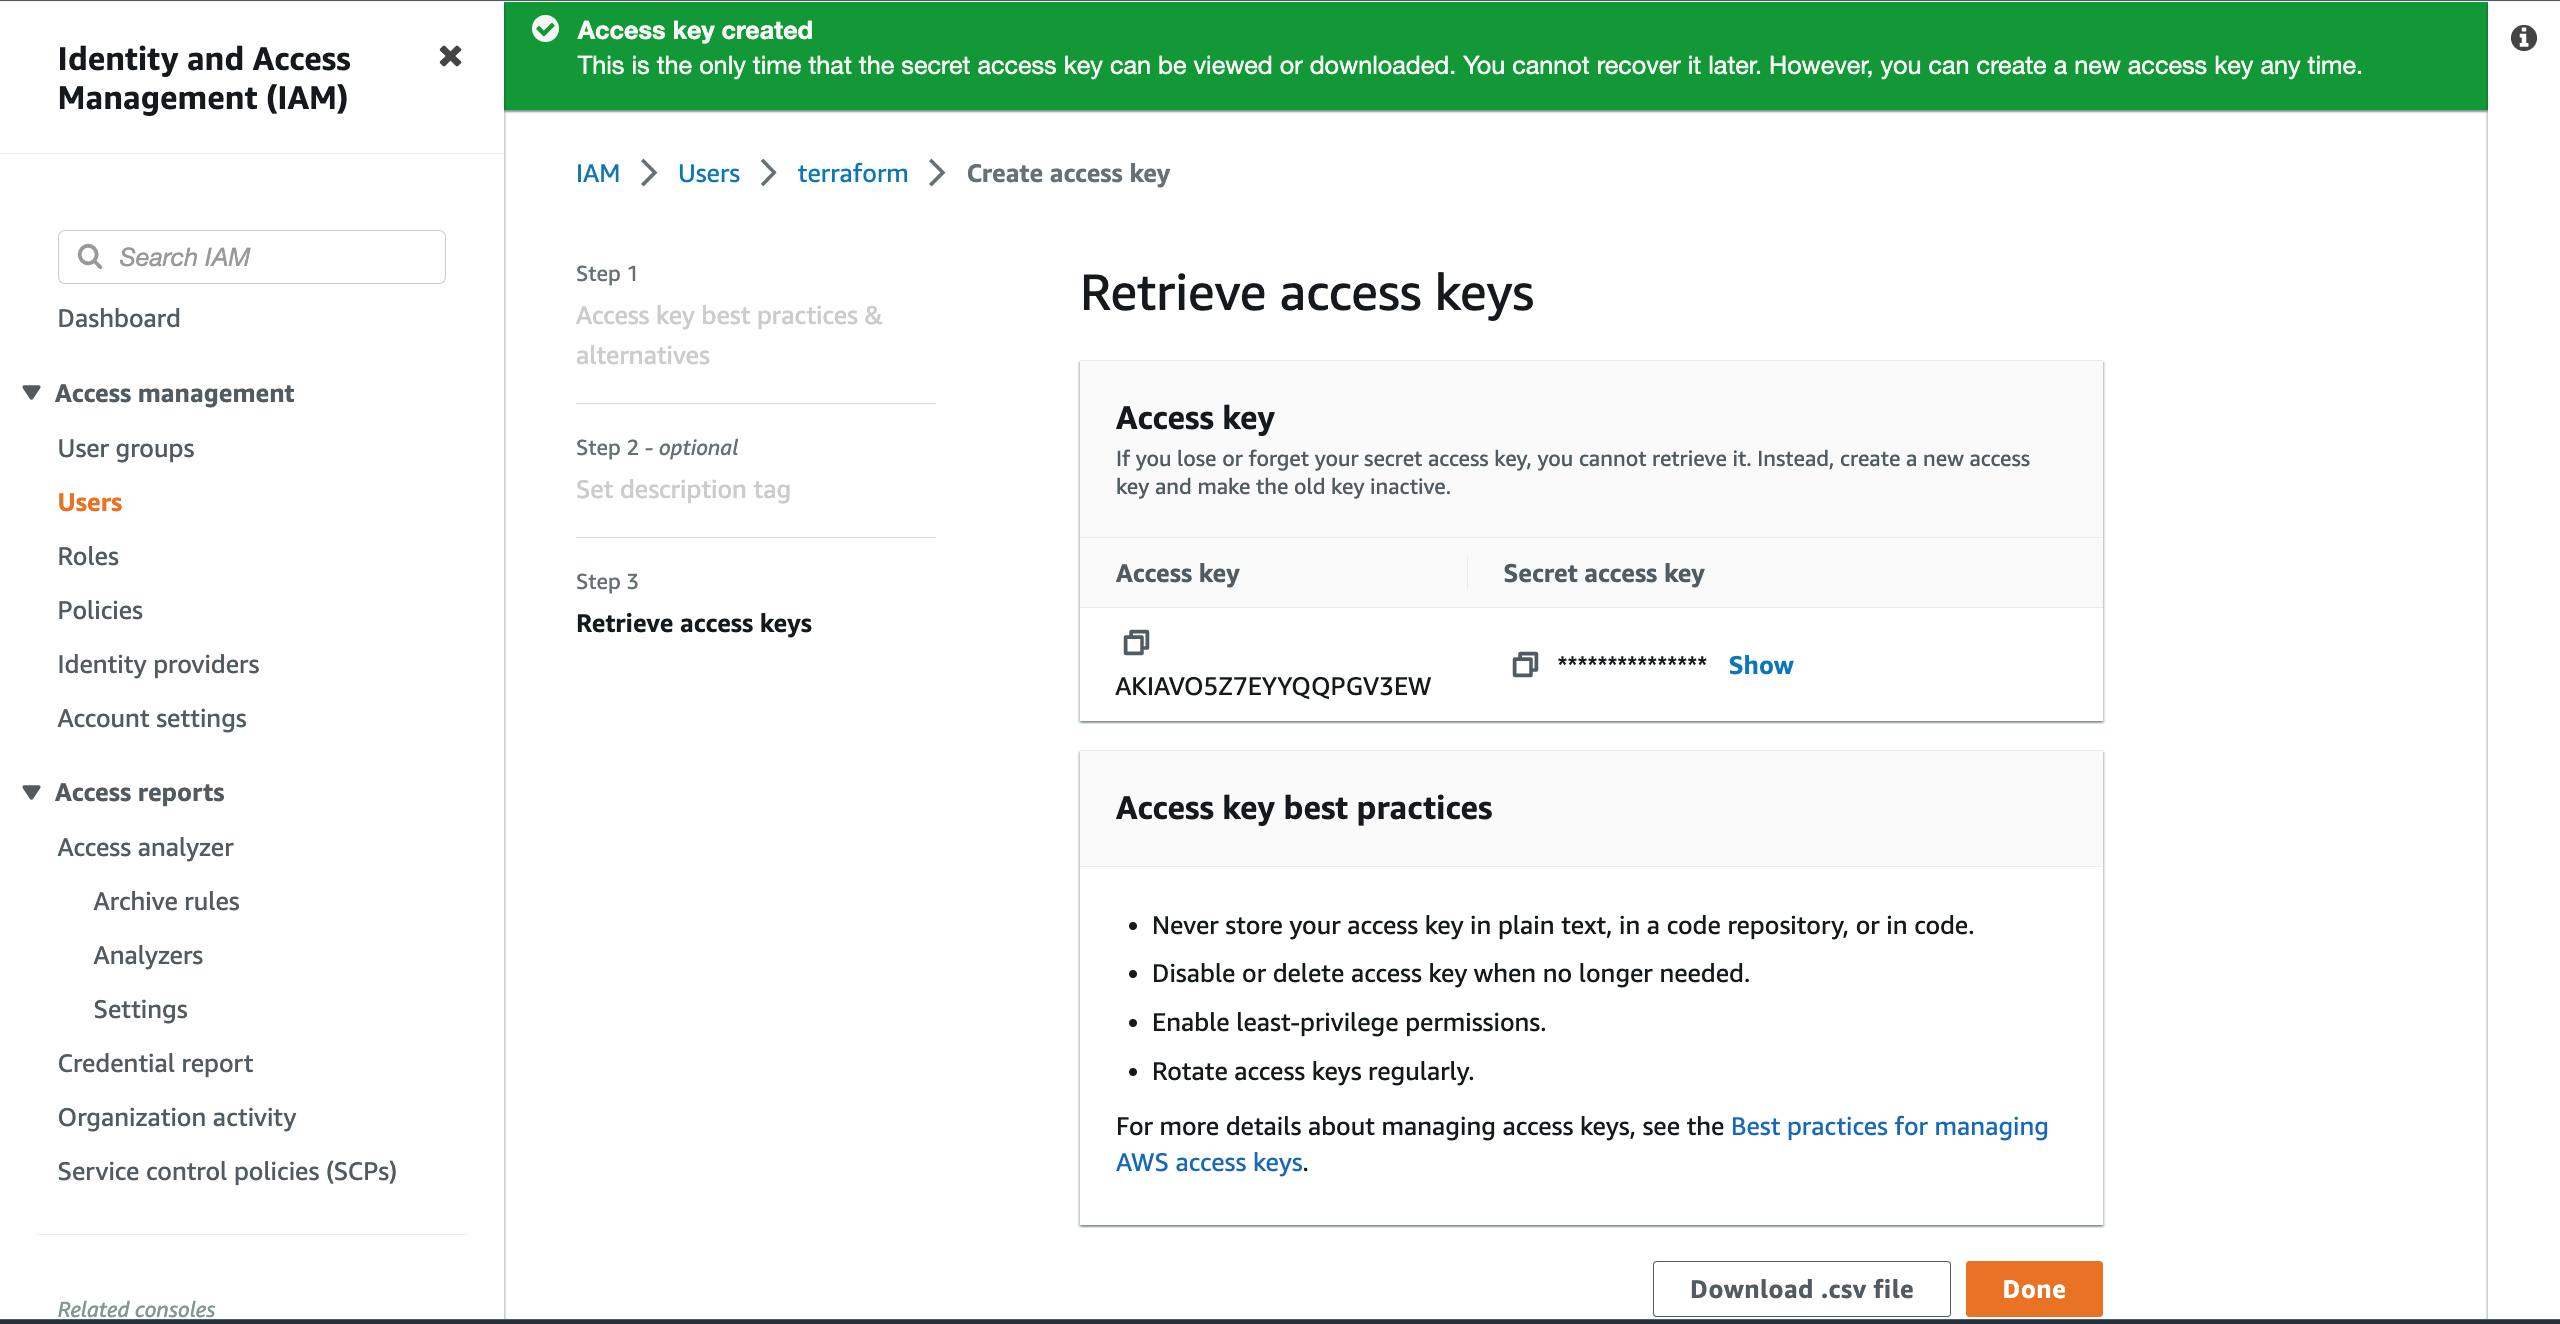
- This new and final page will give you details of the access key you have just generated. Note that once you close the page, you will only see the access key but not the secret access key. This is one of the security measures AWS has put in place. So, you can click on the blue
showlink beside the hidden secret key (in asterisks ********) to reveal the value and copy it. You can then save it in a safe place. You can also click on theDownload .csv filebutton to download the access and secret access keys in a file on your system. You can then click onDoneto close the page.
Authentication and Configuration on the VM
According to the Terraform AWS Provider documentation, the AWS provider plugin supports using an IAM role ( a named profile) whose credentials have been configured in an environmental variable, among other methods. We will be configuring our created credentials in this section of the article.
This method is suitable for when you have to push your codes to a public repository. You would not want to publish them with very sensitive data in relation to the resources you will be deploying.
On your terminal, run:
 sudo apt update && sudo apt upgrade -y
 sudo apt install awscli -y
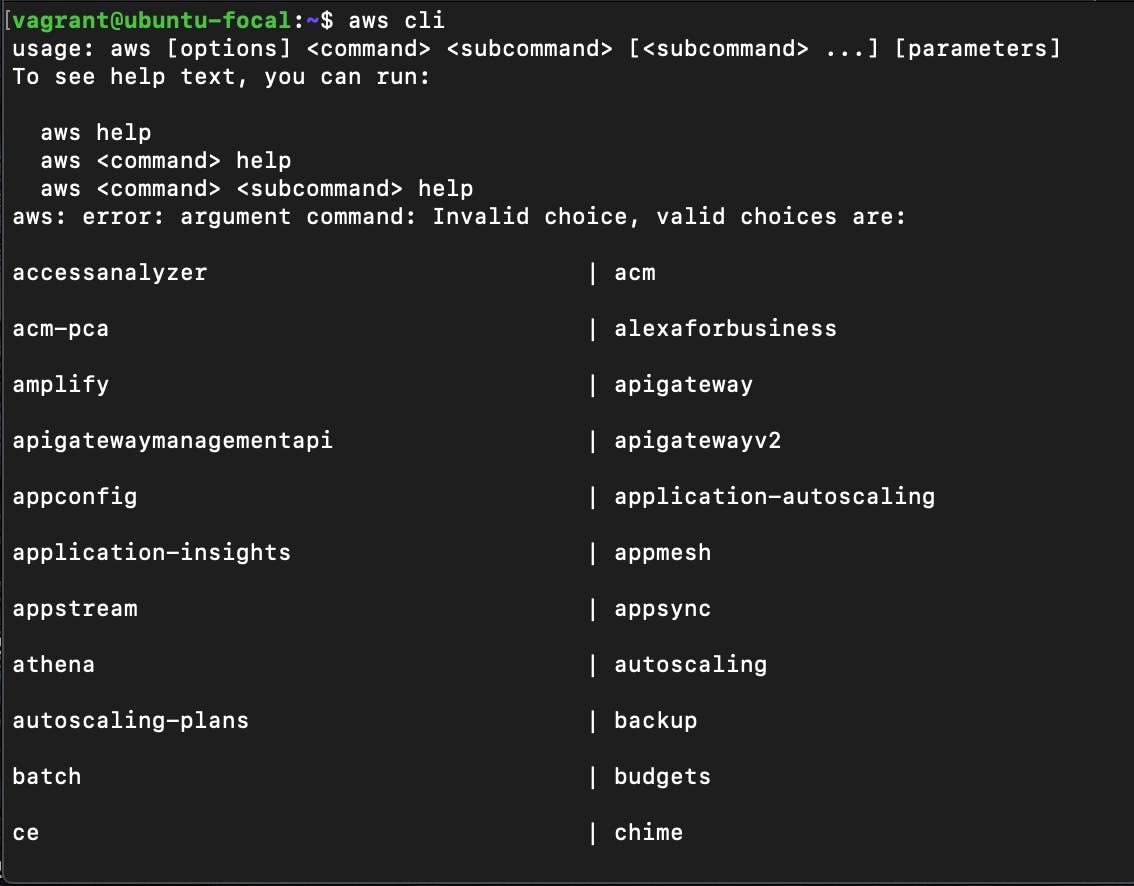
 aws cli
The first two commands will help you update and upgrade your repository, then install the AWS CLI while the third one will help to confirm if the installation was successful. You should have an output like this:
Next, run this command:
aws configureThis command is the easy and quickest way to set up the AWS CLI configuration. On using the command on the terminal, you will be prompted by the AWS CLI to input four key things which are your Access Key, Secret Access Key, Default Region, and Default Output format.
 AWS Access Key ID [None]:
 AWS Secret Access Key [None]:
 Default region name [None]: us-east-1
 Default output format [None]: json
You will provide the Access and Secret Access keys we generated from the console in the first part of the task. Your region will depend on the closest place to where you are based or you can also use
us-east-1as I did.For the output format, there are many options such as json, yaml, text, etc. However, if you do not pick one, the value will default to json. You can pick json as I did above.
You may be wondering how Terraform will be able to access these credentials. Remember we are setting them as an environment variable and this stems from the fact that our
aws configuresettings created a.awsfolder in our home directory.In that directory, you will find two files,
config,andcredentials. Thecredentialsfile holds the Access and the Secret Access Keys while theconfigfile holds details about the region and the output format.You can also add more information and different profiles in the files as seen in the documentation here.
Conclusion
Having successfully set up the credentials needed for the IAM user authorized to connect terraform with your AWS provider plugin, you can go ahead to use your AWS provider block in your .tf file so that the necessary API calls will be made when you issue your terraform init, terraform plan and terraform apply commands.
Happy Coding!!!
